Canoe Construction
Jan 2010
20th - Order the plans for a wooden Prospector canoe from Sandy Point Boat works.
30th - The plans arrive. Watch the canoe making DVD.
Feb 2010
6th - Go to Fletchers to buy some wood. Come away with some reclaimed wood, oily and dirty, but large enough for forms. Wash it down and then cut my first canoe forms.
13th - Continue work on the canoe forms, make the centre form from the old snooker table. I make a cardboard pattern to help make the rest of the forms.
20th - Cutting canoe forms most of the day. Go to buy more G clamps. Call in at Kilburn Timber and ask for some Ash. I had not realised that wood yards in general only sell soft wood. The owner tells me about Fitchett and Woollacott in Nottingham. Finish cutting the forms late on.
Mar 2010
 13th Go to Fletchers to get the wood for the Strong Back. Get mostly 20mm ply. Start work on building the first half of the Strong Back. Build it outside at the front of the house.
14th Build the second part of the strong back in the morning. Attach the two together and fix on all the forms in the afternoon. Just have time to disassemble it before it goes dark. Transport it to my parents later in the evening.
17th Attached the forms to the strong back in my parents garage. They go on well, some need a little reshaping.
24th Order the cedar, oak and ash from Fitchett and Woollacott.
Apr 2010
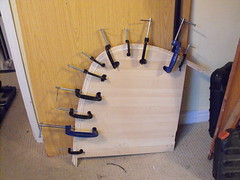 21st - The wood arrives. Steam the first stem piece, goes well.
22nd - Do some more Ash steaming.
24th - Steam and glue the inner back stem pieces.
25th - Shape the stem pieces in the evening.
26th - Fix the two small side pieces in the stem formers.
27th - Fix the stem formers onto the structure. Put on the first strips. Get three strips on one side and two on the other. Pleased with progress, home for 10pm.
28th - Decide on an asymmetrical pattern for the ash strips on the canoe. Get another 8 strips on the canoe.
May 2010
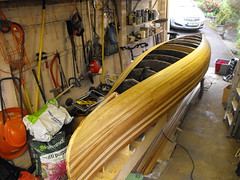 1st - The weather is predicated to rain a lot so work on the canoe. Arrive at about 2pm and leave at about 8pm. Put a number of easy strips up the sides of the canoe, it now has 30 strips.
2nd - I decide that I need to add a few relief strips and level the angle at the front. Leave at about 5pm. The canoe now has 44 strips.
7th - Leave work at 3pm, buy some more staples and glue on the way home. Put a few more strips on and then the staple gun breaks, so work stops.
8th - Disable the safety switch on the staple gun with some cardboard. Start at noon, after a while I realise that I am running very low on strips. Leave at 6pm, with still a quite large hole.
12th - Decide that I need more cedar strips. I start taking some of the staples out of the canoe.
16th - Do the main sanding on both sides of the canoe. Wet the wood to bring out the grain.
18th - Go to Fletchers with a list. I come away with two pieces of Teak or Mahogany. Prepare them and steam one later, it snaps due to a knot.
19th - Steam the other two pieces of Mahogany, pleased with them.
21st - Get some more mahogany from Fletchers. Prepare it and steam it, unfortunately it snaps.
Jun 2010
4th - The second batch of wood arrives from Fitchett and Woollacott.
8th - Start at 6pm, only two more pieces are required to complete the hull.
9th - I fit the last two pieces of wood for the hull.
11th - Take all the staples out.
12th - Sand most of it down, finish at 7pm.
19th - I find a UK supplier of West System Resin 206/105, East Coast Fibreglass Supplies
22nd - I leave work at 2:30pm, pick up the fibreglass and resin. Finish sanding the canoe and then start on the fibreglass. All seems to be going very well. However it will not stay down over the sharp 90 degree corner. After an hour trying to stick it down I rip it all off.
29th - Do a bit more sanding down on the canoe. The back stem gets badly broken.
Jul 2010
 10th - At about 5pm I stick the back of the canoe back together. Pleased with the results, done for about 8pm.
13th - Take out the staples and sand down the repair work from Saturday.
14th - Mix some epoxy with sawdust and stick on the front and back stem pieces.
18th - The plan was to put fibre glass on the front and the back, however I decide as I have all day to do the main body. Takes 4 hours, back hurts afterwards, pleased with the progress.
Aug 2010
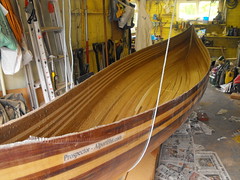 5th - Sand down the first layer of fibre glass, lots of dust, takes longer than expected.
7th - Put the second layer of fibre glass on the canoe, goes well, takes about 3 hours. Dad prints out a piece of paper with the canoe's name on to go under the fibre glass.
8th - Start early, string it up from the roof and then turn it right way up. It looks massive. Grind off the steel screws at both ends, make a start on sanding down the inside.
10th - Start late, do a bit more sanding, the inside is going to take a long time.
11th - More sanding down.
14th - More sanding down in the morning and then work on the deck when my arms get tired.
15th - Start just after 1pm, not sure what to do, in the end buckle down and fibre glass the first half of the inside, pleased to have done it.
17th - Do a little sanding, sit inside the canoe for the first time, write my name on the inside.
20th - Start at 6pm, start on the last sheet of fibre glass, sweating quite a lot at the end.
21st - Cut off the excess fibre glass and glue together the first two oak outer gunwales.
24th - I take the edge off the first two of the oak gunwales, the glue does not hold on either. Reglue them.
25th - More filing to take off a bit more of the oak edge. Drill all the holes to hold the gunwale, buy some 5/8 inch screws.
Sept 2010
Holidays take most of the time.
Oct 2010
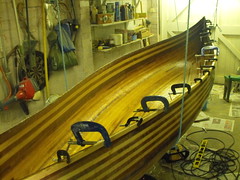 3rd - Sand down the inside and outside fibreglass. Put some resin on part of the starboard outside to fill the gaps in the matting, using the foam roller. Starts OK and then it goes a bit white and milky.
19th - Pick up my third tin of West System resin 105 / 206. Fill in the matting on the port side of outside of the canoe. Goes well.
22nd - The resin from Tuesday is still a bit tacky and soft, I decide that I must have mixed it incorrectly. Sand down some of the drips and runs, use a chisel on others. Look on the West System web site and realise that the weather is far to cold to be using 206 Hardener. Also notice that it says 206 is not for clear applications, I should be using 207!
23rd - Get an electric heater to go in the garage, in order to get the temperature above 16 degs C. Put some fibre glass on the inside at the front and back, rather difficult to get it in. Put the starboard outside gunwale on, takes a while but goes well in the end.
24th - Put the port outside gunwale on in the evening. The heaters have been on all the time and kept the temperature at 22 degs C.
29th - Struggle to get the scarf joint right on the two inner gunwales. Cut the first pieces of Oak decking, decide to use some of the Rosewood? from the Peak 2010 marker posts as decorative strips.
Nov 2010
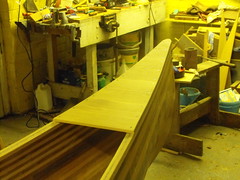 9th - Stick and screw the starboard inner gunwale. The other inner gunwale snaps. Done for 10pm.
10th - Remove the excess resin from the starboard gunwale. Glue the scarf join on the Port gunwale again. Done for 9:30pm.
21st - I have to sieve the saw dust that I had collected from Fletchers to get a fine enough powder. Stick and screw the port inner gunwale. More careful to wipe of excess resin.
23rd - Sand down the Port gunwale. Screw on the smallest part of the rear deck.
26th - Arrive at 5pm. Screw all the rear deck into position. Hand saw it flush with the sides of the gunwale. It then takes a lot of work to get it flush.
Dec 2010
Stamp & Deliver takes most of the time.
Jan 2011
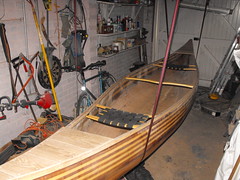 4th - Do the front deck. Takes a long time to do the accent strip but looks good.
12th - Take a bit off the gunwales with the power planner. Make two oak plugs to go at the very front and back and am quite pleased with then. Round off the fore and aft deck to match the plugs.
14th - Try to put some tissue on the back stem but it just does not work. Glue the fore and aft decks in place.
15th - Sand down the fore and aft decking. Measure up for the web seats and yoke, order them from Canoe and Kayak store. Put some strips of fibre glass on both stems to strengthen them. Pleased to have eventually put some fibre glass on the stems after about three failed attempts.
18th - The yoke and seats arrive, place them in position to see how they look.
21st - Fit the yoke in the evening.
22nd - Start at 11am, fit the rear seat and put more resin on the starboard fore and aft.
28th - Buy some yacht varnish and A4 stainless steel coach bolts from Screw Fix. Fit the front seat and put a little filler on the decking. The Deks Olje D1 turns up.
29th Six hours sanding the hull.
Feb 2011
1st - Start at 7pm, finish off the sanding on the outside and inside of the hull. The construction phase is complete, I think that it is ready for some varnish !
4th - Put the first coat of varnish on the outer hull, it looks fantastic.
5th - Start at 1pm, sand the varnish drips off the gunwales. Apply the Deks Olje D1 saturating oil to the gunwales and the decking, very pleased with the results. One year after cutting the first form, it is almost ready.
12th - Mask off the gunwales and put the first coat of varnish on the inside.
16th - Only hand sanding from now, second coat on the outside. Use gloss rollers.
20th - Sand down and put the third coat on the outside.
Mar 2011
23rd - Sand down and put the fourth coat of varnish on the outside.
Apr 2011
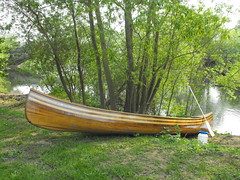 21st - Buy a roof rack for my car and read up on the regulations.
26th - Remove the masking tape from the gunwales, refit the seats. The final weight is 40kg. Considerable debate about how to fix it onto the roof rack. Eventually the canoe makes it out of the garage, have a quick test drive with it on the roof.
29th - First trip on the water, down the Derwent to Darley Abbey. Rather unstable with just two people in it. Put two sandbags in to calm it down a bit.
May 2011
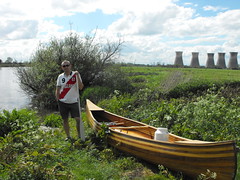 6th - Drop both seats by 3 inches. Winch it up to the garage ceiling for storage.
8th - Take it on the Trent from Twyford to Swarkestone.
Sandy Point Boat works - plans
Fletchers - wood for forms
Fitchett and Woollacott - wood for canoe
Datum Patterns - logistics and advice
East Coast Fibreglass Supplies - fibre glass
West System - resin
Canoe and Kayak store - yoke and seats
Screw Fix - varnish, screws and bolts